A quick online search for “strengthen the pelvic floor” reveals a lot about how many of us view the pelvic floor and its role in our health and function. There are any number of recommended exercises for the pelvic floor, some that include products to assist you, and with most advocating an approach that involves isolating the contraction of the pelvic floor muscles. This approach can be helpful for building some basic awareness of the pelvic floor – an important component of developing pelvic floor strength. But this approach is also limited in that it fails to address the broader and more essential role of the pelvic floor in facilitating alignment and functional movement.
The Pelvic Floor Does Not Work in Isolation
The pelvic floor muscles coordinate with several deep muscles in the trunk in order to stabilize the lower trunk and maintain the integrity of the pelvic organs, preserving continence and sexual function. These deep trunk muscles work synergistically with the pelvic floor and include the diaphragm, psoas, spinal muscles and the deep abdominal muscles. Collectively these muscles act as a flexible cylindrical, called the Thoraco-lumbar cylinder or TLC, with the pelvic floor forming the bottom of the cylinder. In addition to the muscles themselves we have a fascial layer that acts as a web-like connection between them. This facial layer interweaves the trunk and pelvic floor muscles and helps give the trunk and pelvis its shape and tone.
Diaphragmatic Breathing is Essential for Pelvic Floor Strength
This fascial connection between the trunk muscles and the pelvic floor assures no individual muscle will work properly unless there is appropriate movement and engagement in all of the muscles that form the cylinder. In other words, the pelvic floor muscles never contract in isolation, rather they co-contract in response to the movement of the diaphragm and the subsequent abdominal response needed to support the trunk. This means that in order to strengthen the pelvic floor we must breath diaphragmatically, and to maintain consistent optimal pelvic floor tone we must breath diaphragmatically throughout the day and especially during any exercise or activity.
The Role of Intra-abdominal Pressure
When we breath diaphragmatically, pressure is created inside the TLC which is similar to the pressure created inside a ballon filling with air. This pressure is called intra-abdominal pressure (IAP), and under ideal circumstances the muscles forming the TLC all respond to this pressure by contracting against it. This response should be relatively equal throughout the walls of the cylinder and serves to contain, maintain and regulate the IAP. Maintaining IAP helps us avoid stress on the pelvic and abdominal organs, spinal muscles and vertebral joints. Thus the pelvic floor has the important role of regulating IAP by helping to maintain relatively constant control of the cylinder, and in this way the relative tone of the pelvic floor directly influences the strength and function of the whole lower trunk.
If we do not breath diaphragmatically then we do not create proper IAP, and without proper IAP there simply cannot be the coordinated contraction of all the muscles of the cylinder necessary for trunk stability. In other words, there will be no response in the pelvic floor muscles if we are not breathing correctly.
Picture this: upon inhalation the pelvic floor widens to support the downward pressure created by the diaphragm. Then upon exhalation the pelvic floor co-contracts with the diaphragm and moves slightly up into the pelvis while the diaphragm moves back up into the ribcage. This coordinated movement between diaphragm and pelvic floor has a gentle squeezing effect on the spinal column and disks, keeping them plumb and lengthening the spine.This protects the joints of the spine from wear and tear and prevents damage to the disks.
Before beginning any pelvic floor specific strengthening exercises, diaphragmatic breathing with correct intra-abdominal pressure must be mastered!
For some people diaphragmatic breathing may be challenging at first, particularly if there is a a lot of tension in the trunk muscles. For others, years of chest breathing and/or shallow breathing can also make the trunk muscles weak and the back muscles too tight, preventing the alignment of the pelvis and ribcage necessary for diaphragmatic breathing to occur. Very often in these circumstances the pelvic floor muscles themselves are too tight, and this tension increases the tendency for pelvic floor disfunction.
Signs of and Contributors to Pelvic Floor Tension
Signs of a tight pelvic floor include lower back pain, incontinence issues, prostate and or bladder issues, prolapsed organs, and impairment of sexual function. Typically a tight pelvic floor is accompanied by certain muscular habits that manifest in conjunction with the pelvic floor tension. Habits that contribute to pelvic floor tension include clenching the lower glutes, tucking the pelvis, and sucking in the abdominal wall.
We live in a busy, stressful world and all of us are subject to potential stressors daily. An overactive stress response, either accompanying or even caused by long term habitual chest breathing is another important cause to be considered with pelvic floor disfunction (PFD). In such cases an effective approach to stress reduction is an essential component to any remedy.
Many of us have jobs that require a lot of sitting, either at the office and/or in the car on the way and home again. Those of us in this group are especially at risk of developing pelvic floor disfunction because long term sitting increases pelvic floor tension. The employment of a standing desk can help in these instances, but a more careful look at how we’re standing, or sitting, is an important part of any long term resolution.
Ignoring calls of nature because of busyness or distraction can be yet another source of stress that directly contributes to pelvic floor tightness and disfunction in a very obvious way. “Holding it” can become a habit that should be taken seriously, especially if PFD has already manifested.
Less obvious but no less important a contributor to PFD are cultural influences and images that present alignment pattens that we may try to emulate. Patterns such as a military posture with its arched lower back and tight glutes, as well as images from the fashion industry presenting beauty in the form of female bodies with forward hips and tucked pelvises no doubt reinforce patterns in younger people who are already developing these patterns through excessive sitting and staring at screens. Limiting screen time and setting healthier examples with our own alignment and movement habits are important considerations when managing this issue with our children.
Even in the wellness/fitness industry we are regularly presented with images of “healthy” bodies with sucked in over developed abdominals that are bulging and tight. We must remember that muscles that are too tight are also too weak to be functional.In order for a muscle to function well, it must have its full range of motion and be able to both contract well AND relax well. This is important to keep in mind not only with respect to aesthetics, but also with respect to steps we might take to mange pain. Bracing with the abs to manage back pain or PFD, for instance, is one of many habits that may be contributing to rather than solving our PFD.
A psoas release is a simple yet extremely effective way to help to begin to release many of the habits that contribute to PFD:
Once you begin to breath diaphragmatically and freely throughout the day and you combine it with a daily practice of letting go of dysfunctional tension habits, you will be ready to practice more specific pelvic floor re-training and strengthening. Because of the inter-connected fascial webbing, strengthening your pelvic floor muscle necessitates the ability to feel and develop responsiveness to the co-contraction of the muscles of the thoracolumbar cylinder.
Since the pelvic floor muscles are hard to feel, it can help to have a basic understanding of their anatomy to visualize and increase awareness of them. The pelvic floor muscles connect the pubic bone to the tailbone and each ischial tuberosity (sitting bone) to the other, and these muscles reside in three detailed layers.
Again, pelvic floor muscles are part of a deep myofascial grouping (close to bones and deep in the body), and because they are deep within the body these muscles are hard to sense. The function of these deeper muscles can also appear more subtle than that of the large superficial muscles like the quadriceps or gluteals which are much easier to feel and to activate.
But the deeper muscles of the trunk contain a larger amount of proprioceptive nerves than the superficial muscles, and these nerves help our body respond to changes in movement and loads quicker than our superficial muscles can – even quicker than we can respond with our thoughts. This is why symptoms of mild incontinence often occur with quick motions like jumping, running, and sneezing. Each of these motions requires the deeper muscles to be strong and responsive in order to manage the increased loads these and other movements may place on the pelvis and lower trunk. Strong and responsive trunk and pelvic floor muscles serve to prevent excessive loading of the bladder and urethra which might otherwise cause leaking.
To help you feel how these muscles co-contract together, here is a simple exercise:
In part 2 of this post we will look further at how to further strengthen the pelvic floor with more dynamic movements that involve bending, lifting and walking. Stay tuned!
https://www.alignmentlab.net/wp-content/uploads/2023/08/Alignment_Web_Logo-300.jpg00Robert Brookhttps://www.alignmentlab.net/wp-content/uploads/2023/08/Alignment_Web_Logo-300.jpgRobert Brook2019-05-21 20:13:342019-05-21 20:13:34A Deeper Look at Pelvic Floor Strength and How to Build It – Part 1
The other day I received an email from a good friend and client sharing a link to an article in the NY Times. The article discusses a recent study done with participants from an earlier study, completed in 2003, on the effects of exercise. This earlier study, done at Duke University and called “STRRIDE” (for Studies Targeting Risk Reduction Interventions through Defined Exercise), took several hundred individuals identified as sedentary and overweight and randomly assigned them to either a control group or one of two exercise groups. The two exercise groups included one that did “moderate” exercise, such as walking, and one that did “vigorous” exercise such as jogging. The exercise groups did their assigned exercise for 8 months. The control group did not exercise at all.
As you might expect, both exercise groups showed marked improvement in several health markers including aerobic fitness, blood pressure, insulin sensitivity and waist circumference, while the control group generally showed no improvement. For this recent study individuals from each of the groups were invited back to the lab for testing to see how they were faring. Those that agreed to come back were tested for aerobic capacity and metabolic health and were asked about their health conditions and medications.
Not surprisingly, those from the control group in the original study were even less fit now than they were in 2003 while those from either exercise group were still better off than the control group. Less obvious but still not surprising was the fact that those who had done “vigorous” exercise in the earlier study showed greater aerobic capacity than those in either the “moderate” exercise group or the control, losing on average only 5% vs. a 10% loss in the other two groups.
But what was very surprising to these scientists was that the “moderate” exercise group, who had only walked 3 times a week for 8 months during the earlier study, showed substantial improvement in blood pressure and insulin sensitivity compared with both the “vigorous” exercise group and the control group. NOW THIS IS THE MOST INTERESTING PART – these walkers also showed these lasting improvements to their health EVEN IF THEY HAD STOPPED WALKING AFTER THE 8 MONTHS! William Kraus, the professor of medicine and cardiology at Duke who oversaw the study suggested that the effect of exercise on our genes and our cells might explain the study’s findings.
I regularly have conversations with clients who ask me “is this problem something I can do something about or is just my age?” I always encourage clients to avoid chalking up problems to age, even if age might be a factor, because once we decide that some pain or loss of function is due to age then it places that issue into the category of “PROBLEMS I CAN’T DO ANYTHING ABOUT.” Once a health issue is put in this category it robs us of the capacity and motivation to do anything to improve it, and there’s just about always something we can do to make things better.
I see deferring to genetics in a similar way. If we make the assumption that a health issue we have or might develop is due to our genes, even if our mother or father did have the same condition, then it hampers our ability to deal with it in the same way that saying a problem is “just because I’m getting old” does. As long as the problem is under the “CAN’T DO ANYTHING ABOUT IT” umbrella then we’re unlikely to respond effectively.
Studies demonstrate, and pretty consistently I might add, that the health issues that most of us are dealing with or that we are most concerned about are caused by genetics only about 10 to 30 percent of the time. The other 70 to 90 percent of the time these health issues are caused by diet and lifestyle. Cardiovascular disease and diabetes in particular have been shown to manifest much more from lifestyle causes than from any genetic predisposition. Not only that, but it’s also been demonstrated that changes in lifestyle can influence our genetics so as to increase our genetic resistance to a chronic diseases such as cancer.
A 2016 pilot study done at The University of California San Francisco revealed that men with low risk prostate cancer who had decided to forgo treatment unless the disease progressed could improve the genetic markers for cancer by changing their diet. These men followed a diet outlined by Dr. Dean Ornish, and the men who followed this diet for 3 months saw some 500 genes change as a result. This included some tumor-suppressing genes that became more active with the change in diet, as well as some genes associated with increasing cancer risk that had switched off. The study did not set out to determine whether or not the changes in diet led to better long term health outcomes, but the changes in these men’s genetics were significant and promising.
Clearly our dietary choices are a powerful force for influencing our genes and any contribution those genes might make toward our manifesting a health problem, but what about our lifestyle choices? In her groundbreaking book, Move Your DNA, Katy Bowman argues for lifestyle, in the form of our daily movements, as a huge contributor to the health of our genes and their expression. She illuminates the important role of movement in gene expression by highlighting the difference between the genome and the mechanome.
The genome is the gene that we tend to think about when we think of our genes. This is the gene that resides with all our other genes in the nucleus of each and every one of our cells. This gene expresses itself by activating certain physical and/or functional characteristics that make us who we are as an individual. The mechanome is made up of this gene plus all of the exterior forces, many of them mechanical, that play a role in determining if and how a particular genome will be expressed.
To think of a gene as the primary actor in determining our health outcomes is like imagining some kind of stealth bomb in our body that will some day, likely when we least expect it, set off its charge and send us cascading toward some miserable end. Alternatively, the mechanome model presents a gene that is flexible and responsive to input, particularly movement input, and one that can, given the right input, just as easily contribute to a positive health outcome as a negative one. Therefore the amount and way we move, both a huge part of our lifestyle choices, can be a significant influence on our genes and how they influence our health and longevity.
Movement choices are like the dietary choices we make in that they provides us with yet another powerful tool by which to influence our health on the genetic level. In a recent post on yoga for health I discussed the role of mechanotransduction in movement and I describe how movement can be used to influence tissue health on the cellular level. Although I highlight yoga specifically in that article, yoga is just one example of an approach to movement that provides effective ways of using mechanotransduction to affect tissue health. Yoga is intelligent movement, but there are other ways of moving intelligently that can have similar benefits. Walking for instance, appears to have played a significant positive role in the gene expression of the “moderate” exercisers in the “STRRIDE” study discussed above.
It should be encouraging to all of us, and especially those of us who worry that our genetic makeup may be undermining our health and function, that the studies mentioned above show we can improve our chances of better health outcomes with diet and exercise / movement, even if we have genetic predispositions. These studies reveal that we needn’t be at the mercy of our genes and that we have it within our power to change our genes in ways that are positive and lasting.
https://www.alignmentlab.net/wp-content/uploads/2023/08/Alignment_Web_Logo-300.jpg00Robert Brookhttps://www.alignmentlab.net/wp-content/uploads/2023/08/Alignment_Web_Logo-300.jpgRobert Brook2019-05-02 23:35:442019-06-04 20:04:55Genetics and Health: Why Diet and Movement Matter
As a yoga teacher I’ve been advocating for a proactive effort to increase flexibility in the body for more than 2 decades. Yoga is generally seen these days as a valid way of increasing flexibility, but not necessarily one that offers the complete complement of physical benefits regarded as essential for overall health and wellness. For instance, many yoga students feel they need to engage in other activities for cardiovascular exercise, such as spinning, Zumba or running, to keep themselves healthy. Yoga, it appears for these folks, is not enough.
A decade or so ago when yoga was still “the new kid on the block” in the fitness industry, it enjoyed a sort of “cure for everything” status that temporarily shielded it from the responsibility to deliver on that promise. Now that yoga has slipped from it’s peak of popularity into the ever expanding menu of fitness options, it is held to the same standards that other types of “exercise” are and its strengths are weaknesses as an exercise form, depending on the type of yoga or the skill level of the instructor, have become more commonly known and accepted.
One strength of yoga that appears to be gaining ground in the scientific community and with the public is its efficacy in reducing the effects of stress and as a contributing factor to overall health and well being. A 2012 National Health Interview Survey (NHIS) found that, among the people surveyed who practiced yoga, 94% said they did so for “wellness-related reasons – such as general wellness/disease prevention or to improve energy,” with 82% of the respondents saying that it “improved their overall health” and 86% saying yoga reduced their stress.
I should point out here that the benefits of yoga reported above, along with other benefits reported for its positive effects on back pain, sleep, menopause, diabetes and other chronic disease and weight loss are mainly anecdotal. There is limited scientific support for nearly all of the claims made in yoga magazines and websites. But for some of these claims, such as yoga’s efficacy in building strength, the benefits are clear and undeniable.
The fact is, yoga postures done correctly place mechanical loads on our muscles, ligaments and bones in controlled and specific ways, and this type of loading, as dictated by the laws of our physical universe and the biological nature of our tissue, increases the load bearing capacity (ie- strength) of these tissues quite effectively. Without a doubt, yoga makes us stronger.
So if there is at least some evidence, even though mostly anecdotal, that yoga is good for stress reduction and overall health and well being, and clear evidence that yoga can be an effective way of building strength, then I would argue that latter is closely related to the former. The fact that yoga helps build strength is the reason that it helps with stress reduction and overall health.
This is because our overall health is largely defined by the health of our tissues. What are we but a highly complex arrangement of tissues and extra-cellular fluid (leaving aside the mind and the soul which are a subject for another time). We cannot be healthy and have a significant amount of unhealthy tissue in our body. Conversely, our overall level of tissue health is directly related to our overall health in general. The healthier our tissue is, the healthier we are.
So what exactly does strength have to do with tissue health? The answer lies in understanding our tissues on both macro and microcosmic levels. If for instance I want to strengthen my legs and hips I might choose to do more standing postures. The mechanical loads these postures place on the muscles and other tissues in my legs and hips will help these tissues handle loads better, thereby making them stronger. But what happens to the individual cells in the various tissues in my legs? I would argue that these same postures also improve the strength of the individual cells in the tissues that make up my legs and hips. This is due to a phenomenon knowns as mechanotransduction.
Mechanotransduction occurs when a mechanical stimulus is converted into a set of biochemical reactions and corresponding a cellular response. This cellular response can vary depending on the type of cell and stimulus, but generally involves enhanced gene expression and positive physical changes to the cell. Scientifically, mechanotransduction is a concept still in its infancy in terms of study and understanding, but the studies that have been done suggest that mechanical loads on the microcosmic level mimic those on the macrocosmic. That is, mechanical loads that make our muscles and bones stronger also make our cells “stronger” in the sense that they improve their adaptiveness and enhance their functional role in our bodies.
Therefore I’d suggest that “weight bearing exercise”, which is basically deliberate mechanical loading of our tissues, not only has the potential to build strength and resiliency in that tissue but also, as a result of mechanotransduction, similarly loads our cells and stimulates greater responsiveness and resiliency on the cellular level, improving the health of those cells, the tissues they make up and our overall health in general.
I place “weight bearing exercise” in quotations here because it can and does mean more than it’s common interpretation suggests. Sitting for example, can be a kind of “weight bearing exercise” in the sense that it places mechanical loads on the tissues of our hips and legs and, if done in the right way, has the potential to make them stronger and more resilient. On the other hand, sitting can and often is counterproductive in this regard because it is not done in the right way, or is done for too long, and will in this case damage tissue health by limiting mechanotranscduction and impairing tissue health.
This brings me back to the importance of flexibility, or as I prefer to think of it, mobility. Having good flexibility means having functional mobility which is the ability to mobilize the body in a variety of ways. Mobility allows me to move more of my joints and tissues through their various ranges of motion and this means a wider and more varied distribution of mechanical loads to more of my tissues. A major benefit of mobility therefore is the stimulation of mechano-transduction in more of the cells in more of my tissues and an improvement in the healthful expression of those cells and those tissues. Floor sitting done properly, for example, can be and effective way of improving the mobility of the hips, knees and ankles and can therefore promote the health of the tissues in the lower half of the body.
A less obvious benefit to functional mobility is the enhancement of my cardiovascular system. Improved and varied mobility of the body generally improves the mobility and more specifically the elasticity of my arterial system, helping to normalize blood pressure and reduce the effects of various types of stress on vessel walls. This particular benefit of functional mobility, which incidentally is facilitated rather well by regular and correct practice of yoga, improves the responsiveness and resiliency of my cardiovascular system and prevents chronic diseases related to it.
I’ve tried here to make a case for yoga as having the potential to be as complete as any other form of “exercise” for promoting and maintaining health. It’s reputation for helping mainly with flexibility and stress is a very limited view that fails to tell the whole story of its full potential. This potential, to literally enhance and maintain our tissue health on the cellular level, is open to anyone willing to spend the time and energy to learn it.
https://www.alignmentlab.net/wp-content/uploads/2023/08/Alignment_Web_Logo-300.jpg00Robert Brookhttps://www.alignmentlab.net/wp-content/uploads/2023/08/Alignment_Web_Logo-300.jpgRobert Brook2019-02-26 21:44:082019-02-27 01:27:50A Case for Yoga: Improving Strength, Mobility and Overall Health
At Alignment Lab we always encourage our clients to move more and build strength, but it is common in our practice to see clients who have developed injuries from working out at the gym with certain machines or when doing isolated exercises with weights. Many of the exercises these clients are doing involve movements that fall under the category of open kinetic chain movement (OKCM). In the interest of maximizing the health benefits of exercise and minimizing the chances of injury, we generally try to steer our clients away from (OKCM) exercises and guide them towards exercises that feature closed kinetic chain movement (CKCM).
What is the difference? OKCM exercises involve isolating a particular muscle and then challenging it with weight and or resistance by shortening (concentrically loading) the muscle. A classic example is the biceps curl, which involves picking up a weight, say a dumbbell or kettle bell with the hand, and then bending the elbow to lift the weight toward the shoulder. This exercise can be done with one or both arms, and in either case the hands are not fixed, thus the “open” kinetic chain.
CKCM involves movement relative to a fixed point. This means that some part of the body, usually a hand or a foot, is brought in contact with a stable surface such as the floor or a wall. Typically there is some amount of weight bearing involved to keep that contact point stable. The stability provided by the fixed point and the weight bearing promotes stability in the body where needed so that the exercise can be done with greater safety an efficacy.
In the example of the biceps curl, there is no fixed point. Every part of the body has the potential to move in some way during the exercise, and thus there is a lack of stability and a greater chance of strain. This exercise not only increases the chances of straining the biceps, but also the shoulder joint. Without the added stability of a fixed point the body will have a harder time keeping the humerus stable in the shoulder socket, increasing the chances of exceeding the load bearing capacity of the joint. In the end, we may end up with bigger biceps, but likely more wear and tear on the shoulders.
One solution to this problem with the biceps curl that is often used to improve its efficacy is to stabilize body by sitting on a stable seat and then placing the elbow of the working arm on a support. These changes do serve to focus the action of the arm more effectively on the biceps, but they do not necessarily make it more safe. The reason is that even though to some degree stability has increased, it has not increased in a way that eliminates potential impact on the shoulder joint.
Because there is a greater amount of force on one isolated joint, in this case the shoulder joint, this movement can easily lead to strain in the tendon of the bicep attaching to the shoulder joint. This is because mechanoreceptors in the shoulder are not well activated in this exercise. The mechanoreceptors help us feel joint position, and if they are not activated it will be more difficult to sense whether or not the shoulder joint maintains functional alignment. If the exercise is done without a functional alignment in the shoulder joint it may result in an injury.
It is important that we continue to challenge our muscles and their ability to bear weight, but preferably not at the expense of our joint health. Open kinetic chain movement (OKCM) exercises tend to increase this likelihood. Closed kinetic chain movement (CKCM) exercises on the other hand provide an opportunity to increase our strength with much less chance of injury.
While the primary difference between a CKCM exercises and an OKCM exercise is that CKCM exercises feature movement relative to a fixed point, another equally important difference is that CKCM typically feature some approximation of the joint due to the weight bearing on the fixed limb. This means that pressure, usually caused by the weight of the body, pushes the arm toward the shoulder joint, soliciting a stabilizing response in the joint. A great example would be a side plank. In this exercise one hand is fixed on the floor, and the shoulder on the same side gets approximated by the weight of the body. This helps stabilize the shoulder joint and facilitates healthy rotational movement (abduction) around the joint.
CKCM exercises have several features that account for their improved efficacy relative to OKCM exercises. First, the increased joint stability in CKCM allows for better eccentric loading of the involved muscles. Eccentric loading means that the muscles involved contract and lengthen at the same time. When a muscle contracts while lengthening, sliding motions are introduced into the fascial sheets that cover muscles groups and individual muscles.This sliding of the fascial sheets adds lubrication, nerve stimulation and a protective barrier against injury.
Another feature of CKCM is that it involves the motion of muscles across multiple joints. This means that these movements go beyond the isolation of one particular muscle, unlike many of the OCKM exercises commonly used in strength training (such as the biceps curl). Moving across multiple joints requires a complex synchronization of different muscle groups and therefore not only works more muscles but works them in tandem with one another, promoting strength in a functional way.
In addition, when movement occurs across multiple joints with many muscles involved it facilities co-contraction between muscles and this co-contraction, it turns out, is a more efficient way to to bear weight. When muscles co-contract with other muscles, the load is distributed across a broader area, preventing isolated muscle fatigue and decreasing shearing forces on the joints and tissues, ultimately decreasing the likelihood of strain and inflammation.
This alludes to the fact that CKCM’s are good for our tissue. These movements improve blood flow, flexibility, lymph drainage, muscle health, circulatory function and cardiovascular health in a far greater way than any open kinetic chain exercise. CKCM’s will have increased metabolic effects compared to OKCM’s, and they also promote joint health by helping to re-establish proprioception and our ability to sense joint position.
One further benefit of CKCM’s is that these movements improve function of the nervous system. This is because when more muscles and joints are moving in a complex closed-kinetic chain pattern, more nerves are firing.More nerves firing means more blood flow, better communication with the brain and thus a greater ability to dynamically move through space with intelligence.
Finally, closed kinetic chain movements are simply more functional than open kinetic chain movement in that CKCM’s are more often based on movement patterns that are innate to the human body. As babies and toddlers, each of us develops our physical function through a series of innately choreographed movements, and these movements manifest from the age of three months up to the point of walking without any instruction or mimicry taking place. This means that we don’t learn these movements from someone else, we just do them. These movements are innate in all babies, everywhere in the world, and they tell us a lot about functional motion and how the utilization of the hands and feet in a closed kinetic chain is the basis for all natural human motion.
Going back to our bicep curl exercise, let’s compare it with a closed kenetic chain movement involving the biceps and triceps using the example of a wall plank. A wall plank is basically a plank position where the head, shoulder girdle, rib cage, pelvis and legs are all in a stacked, vertical alignment with the hands on the wall standing at arm’s length. The movement involves pushing into the wall to fully extend the elbows.
In a wall plank, the triceps contract in order to extend the arm, but at the same time the biceps co-contract in conjunction with the triceps to stabilize the elbow joint. The biceps also must lengthen to increase pressure into the wall and bear the weight of the upper body. Because the hands are fixed, a whole chain of muscles from the hands into the shoulder joints on into the back and into the abdominal muscles and down into the pelvis and legs also co-contract to help support the body’s weight.
Once it becomes relatively easy to do a wall plank while maintaining good alignment, a full plank can be introduced involving the more challenging version of pushing up off the floor. In a full plank the biceps and triceps get worked but in a clearly functional way that facilitates our ability to lower ourselves down to the floor and lift ourselves up off the floor.
There’s a lot of press about strength training these days with ever growing evidence of its importance for human health and longevity. At Alignment Lab we’re big fans of strength training and we provide it daily with every one of our clients by teaching them mainly closed chain kinetic movements. We’ve found this approach to be ideal for promoting functional strength that is at once empowering, health promoting and practical.
https://www.alignmentlab.net/wp-content/uploads/2023/08/Alignment_Web_Logo-300.jpg00Robert Brookhttps://www.alignmentlab.net/wp-content/uploads/2023/08/Alignment_Web_Logo-300.jpgRobert Brook2019-02-26 20:27:492019-02-27 22:07:22Strength Training: Open vs. Closed Kinetic Chain Movement
Ojas is a concept in Ayurveda that refers to the purest essence of each of the tissues of the body. For those not familiar with Ayurveda, ojas is perhaps most relatable as expressed by the immune system and our body’s ability to resist and illness and recover from it when it manifests. More broadly, ojas is that aspect of each tissue that supports that tissue metabolically on the cellular level, enabling each of our cells and our tissue as a whole to resist the effects of stress and to maintain integrity and resilience.
Ojas supports our health by helping to support healthy agni. Agni means “fire” and is the word we use in Ayurveda to refer to our digestive fire or our digestive power and intelligence. Having a well functioning agni means that our ability to digest and assimilate our food is sound. We all know the expression “you are what you eat,” and in a certain sense this is literally true. The food we eat becomes the tissue that forms our body, but for this to happen our agni needs to be functioning well, and for a well functioning agni we need healthy ojas.
The feeling of having good ojas is easily relatable. When our ojas is good we feel strong, we feel well, our digestion works and our sleep is good. When ojas is insufficient our sleep can suffer, our digestion will have issues and we’ll feel vulnerable. The fact is, we ARE vulnerable when ojas is low, and it is important that we take steps to increase it or risk further depletion and possibly illness.
Maintaining healthy ojas can be done in several ways. First, we must keep our digestion working well. Ojas is manufactured in our bodies through the digestive process. It is the very refined end product of tissue production and thus not only does ojas support our agni and our digestive health, but our agni and digestive health also support our ojas. This symbiotic relationship between ojas and agni points to the fact that our primary means of maintaining good ojas is by seeing to it that our digestive system works well.
Of course to maintain healthy digestion, the right diet is important. I won’t be going into detail on diet in this post, but what I will say is that with diet, we need to learn to recognize how we respond to different foods and to use this recognition to make better choices. Too many people these days try to seek health through addition rather that subtraction. “I feel depleted so I’ll take supplements or eat more meat.” My experience is that its often better to start with “what can I eliminate?” Eliminating foods we don’t digest well or don’t respond well to takes pressure off our digestive system and helps our agni ignite. This in turn helps improve our ability to break down and assimilate our food, forming healthy tissue and making healthy ojas.
A second key to keeping our ojas at a a level sufficient for good health is making lifestyle choices that don’t deplete us. Avoiding depletion requires that we recognize the activities, thoughts and habits that lower our ojas and eliminate or reduce them whenever possible. For example exercise is generally a good thing and most of us need to do more of it, but like anything, there’s enough and there’s too much. Over exercising is a sure way to deplete ojas and invite illness and even chronic disease in very serious cases.
How do I know if I’m over exercising? This is just a matter of paying attention. While it’s not always easy to pay attention to the messages our bodies send us, learning to pay attention to our bodies is an important ability to cultivate. Yoga can be a powerful tool in this case as yoga, in its essence, is training the mind to be aware. Through yoga we develop the awareness and sensitivity to notice the signs that something we are doing is depleting us. Yoga provides us with asana (postures), pranayama (breath work) and ethical principles that help us to see ourselves more clearly, understand our tendencies and make the necessary changes to address them.
This brings us to the third way we can help maintain healthy ojas – awareness of our thoughts and managing mental and/or emotional stress. Stress is a big factor in lowering ojas. Without learning effective ways of managing stress we will struggle to maintain good ojas and good health. Again, yoga can be a big help with stress management as it trains us to keep things in perspective and cultivate a healthy perspective on life. Many people use mediation practice for stress management. I tend to lump mediation in with yoga because yoga is essentially a preparation for and cultivation of a meditative state, as are the many meditation techniques that are currently popular.
Considering ojas and forming an understanding and experience of it is a powerful way of dialing in our diet and lifestyle choices to best suit our constitution so that we may maintain resilience and optimal health on an ongoing basis. Understanding agni and learning to keep it in good working order is essential for building ojas. When we maintain healthy agni we begin to experience the positive effects of ojas and sense of well being it fosters. Whether it be through yoga or some other awareness based practice, it’s a worthwhile endeavor to develop the necessary skills and sensitivity to recognize when our agni and our ojas are compromised and to take steps to restore them.
https://www.alignmentlab.net/wp-content/uploads/2023/08/Alignment_Web_Logo-300.jpg00Robert Brookhttps://www.alignmentlab.net/wp-content/uploads/2023/08/Alignment_Web_Logo-300.jpgRobert Brook2019-02-26 20:16:512019-02-26 20:16:51Ojas and Agni: Essentials For Lasting Health
This past Christmas / New Years Tiffany and I traveled to New Zealand with some friends to see my mother and her husband and to do some traveling on the south island. The way that Air NZD runs their flights to and from, we basically had red eyes going in each direction. In an effort to be good citizens we declared our hiking shoes on the way into the country, only to be delayed in a long and inefficient customs line and missing our connection to Queenstown, then having to take an extra flight to Wellington to get there. When we completed the hour plus drive to Wanaka from Queenstown I was a bit tired, but overall not too much worse for wear.
Then on a warm, cloudless Christmas Day, just a couple of days after our arrival, we hiked Isthmus Peak near Wanaka. The hike took nearly 6 hours and involved climbing continuously up 4000 vertical feet on a completely exposed trail. I was physically tired from it, but again, felt pretty good the day after and going forward.
A day or so after that we splurged big and hired a plane to fly us from Wanaka to Milford Sound where we took a 2 hour cruise through the sound before hopping back on the plane and flying back to Wanaka. I am quite prone to motion sickness, and this was not a big stable commercial jet but a 6 seater prop plane that felt like flying in a yellow bucket with wings. The views were out of this world, but also dizzying. My friend seated behind me faired rather poorly, but I managed to walk away from the trip with relatively little impact.
After a 4 night stay in Wanaka we said goodbye to my mother and her husband David, and then Tiffany, our friends and I hit the road for another 10 days. In those days we spent countless hours in the car and never slept in the same strange bed for more than 2 nights. The balance of the trip included more hiking, quite a bit of sight seeing and a lot of restaurant food.
On the way home from Auckland after connecting from Nelson I watched 4 movies and semi-slept for a few hours before navigating customs and catching the airporter back to Marin. Oddly, when I got home from the near 24 hour return trip I felt almost as though I had never left and traveled 1/2 way around the globe and back again.
What I realized from this experience and the reason I’m telling you about it is that I had, without really focusing on it or explicitly trying to cultivate it, managed to build a fair bit of resilience. I can think of no other way I would have made such a big and involved trip with so little relative impact on my health and sense of wellbeing.
This got me thinking about resilience and how it manifests. Most of us can claim at least some degree of resilience in some areas of our lives. I might have good flexibility and enjoy the kind of resilience that affords by allowing me to occupy relatively small and cramped spaces for extended periods, like coach airplane seats for instance, and bounce back quickly from it. Or I might have good strength and can manage lugging heavy baggage through airports or charging up and down mountains in the hot sun without suffering an injury. Or I might have a digestive system that can handle all sorts of foods from all sorts of unfamiliar kitchens with very few digestive complaints. Or perhaps I have an immune system that can handle the stress of a lack of sound sleep and an excess of different environments and degrees of air quality without succumbing to bugs, respiratory or otherwise.
But it’s unusual, in my view, that each of us has all of the areas of our life that afford us resilience in optimal working order, and for most of us any deficiencies in resilience can be corrected with very doable changes in diet and lifestyle. This view has inspired me to write a series of posts on the subject. These posts will address several key areas where we can increase our resilience and they will offer suggestions on how to build and effective bulwark to the inevitable stresses that we all endure, voluntarily or otherwise.
I hope you’ll find these helpful. As always, I welcome your feedback.
https://www.alignmentlab.net/wp-content/uploads/2023/08/Alignment_Web_Logo-300.jpg00Robert Brookhttps://www.alignmentlab.net/wp-content/uploads/2023/08/Alignment_Web_Logo-300.jpgRobert Brook2019-02-26 19:58:462019-02-26 19:58:46Building Resilience and What I Did on My Christmas Vacation
Arguably the most challenging of the classical standing postures, virabhadrasana 1 or “Warrior 1” places great demands on our pelvic and trunk stability, along with the strength and mobility of the hips and shoulders. This posture requires the ankles and feet to work well, and that our spinal column has good mobility.
When doing Warrior 1, we must maintain constant awareness of where all of the various mechanical loads are placed, and thus Warrior 1 also poses a great challenge to the mind. We must remain present at every moment we are in the posture, both for safety as well as a successful outcome.
Warrior 1 includes a back bend as one of its key elements. If you have a low back injury, I would not recommend learning this posture on your own. PLEASE SEEK A SKILLED INSTRUCTOR FOR HELP.
Even if you’ve had experience with the posture, I would encourage you to watch my video on stabilizing the lower back for backbends before watching this video for a better understanding of how to approach the back bending element in Warrior 1.
https://www.alignmentlab.net/wp-content/uploads/2023/08/Alignment_Web_Logo-300.jpg00Robert Brookhttps://www.alignmentlab.net/wp-content/uploads/2023/08/Alignment_Web_Logo-300.jpgRobert Brook2018-10-22 22:32:022024-10-14 18:13:04Warrior 1 (virabhadrasana 1) – Set Up and Cues
Several years ago when I was deep into Katy Bowman’s bio-mechanical approach to postures and movement I began to better understand some of the postural habits and faulty mechanics that were impacting my health and the health of my clients. It became clear to me that it was these habits and their frequent repetition while standing, sitting, squatting, bending forward and walking that lead directly to the manifestation of the chronic injuries and pain patterns that are epidemic in our modern lives. I also understood that if we were to overcome our injuries we needed to address them at their root cause by changing the way we move.
As this understanding came into focus, I started to take a closer look at the yoga postures I was doing and teaching and I had a realization. Those of us who do yoga tend to bring the very same postural patterns and poor mechanical habits we use in our daily lives into our practice of yoga postures. Therefore going to a yoga class often amounts to simply finding new and interesting ways to reinforce our patterns and promote our injuries.
This opinion is partly based on the fact that yogasana or the practice of yoga postures is extremely difficult. The posture themselves are for the most part so complicated and demanding that anything approaching mastery may arguably remain elusive for most. Yet it is also this degree of challenge posed by yogaasana which is the very thing that makes it potentially so powerful. If I manage to master even one posture I will have overcome much of my habituation, physically and mentally.
With the manifestation of this view I began changing my approach to practice and to teaching. I started introducing simpler postures that were more accessible and less physically demanding. I also began to emphasize the development of movement skills that could be applied not just to yoga but to the movements we do all day long. After all, what good is my trikonasana if I can’t bend forward properly to pick something up or squat down to use the toilet.
I then reintroduced some of the classical postures, not so much as postures to be mastered but rather as opportunities to apply the skills learned in the simpler postures to decidedly more challenging ones. The classical postures put the skills we learn in the simpler postures to a strong test, and they provide an opportunity to apply multiple skills at the same time. I liked this approach and still do, but until recently I felt there was something missing.
With the addition of my DNS training I feel I’ve found that missing piece. It’s the skill that integrates all of the other skills and organizes them into a cohesive whole. It’s the skill that transforms a set of applied skills, movements and stretches into a true asana – a posture that expresses both stability and ease. That skill is the skill of stabilizing the pelvis and trunk in a way that not only allows but in fact facilitates free movement. This skill is true “core stabilization.”
The DNS approach to core stabilization is not something I ever learned in a yoga class, but it applies to yoga wonderfully! I feel strongly that it’s a skill that has the power to transform any yoga practice. And for those who don’t practice yoga, proper core stabilization will improve whatever movement practice or sport they choose to do, not to mention greatly improve the movements they do outside of any structured class or activity.
I’ve begun to post a series of short videos in which I offer an approach to setting up some of the more common classical yoga postures. The videos also include some voiceover cues for guidance. My approach to each of these postures emphasizes core stabilization as the foundation for each. I don’t necessarily use the term “core stabilization” in the video, but hopefully as you watch these you’ll begin to understand what I mean when I say “stabilize” or “stabilize the pelvis” or “stabilize the lower trunk,” and you’ll begin to apply this in your own postures.
Before watching these videos I recommend watching the more basic DNS videos that are already posted. It’s important that you understand how to breath diaphragmatically and to establish intra-abdominal pressure before you can do the kind of core stabilization I am referring to in the post and in the asana videos. Just click on the links above to view those videos before moving on to the others.
If you’re new to yoga, these videos are not meant for you. They are intended for students will some experience. If you’re an experienced yoga practitioner or teacher, I ask that you keep an open mind. The feedback I’ve been getting these days from the experienced yogis that find their way into my classes is that I’m doing something very different from what they’ve been taught before. Hopefully this makes for a great reason to take an interest and see what might be of value and not a reason to reject it simply because it doesn’t sync with past experiences or understanding.
Whatever your view, my practice and my teaching have always been and always will be a work in progress. Therefore I welcome your comments and look forward to hearing from you and getting your feedback. No doubt your input will help me refine and improve my practice and my teaching moving forward.
Namaste’
https://www.alignmentlab.net/wp-content/uploads/2023/08/Alignment_Web_Logo-300.jpg00Robert Brookhttps://www.alignmentlab.net/wp-content/uploads/2023/08/Alignment_Web_Logo-300.jpgRobert Brook2018-10-21 22:31:412018-10-24 13:01:10Applying DNS and Core Stabilization in Yoga
Over the last decade as I’ve been exploring different approaches to movement, I’ve always found myself coming back to my yoga practice asking the question “how does what I’ve learned inform my approach to yoga?” For the most part I’ve consistently found that new knowledge from different perspectives has facilitated greater insight into many classical yoga postures and, simply put, allowed me to perform many of these postures better and safer.
Because my personal practice and my teaching have placed greater and greater emphasis on postures that maintain a neutral spine, I must acknowledge that this approach has been at the expense of a great many important postures, arguably the postures that most distinguish yoga from other movement practices. The postures most conspicuously absent for a long time were “forward bends” and “back bends,” the two classifications of asana that involve deliberately moving the spine out of neutral and into flexion and extension respectively.
More recently, as I’ve begun to emphasis stabilization of the spine rather than neutrality, it has opened up my practice and teaching playbook to forward bends and back bends once again. And once again, I find I am understanding and performing these types of postures better than ever before, albeit with a bit of rust to work off. Back bends in particular have been a thrill to come back to and to perform with the ideal combination of safety and efficacy that I believe is essential to the practice of any asana.
One simple posture has laid the foundation for me to reintroduce more back bends into my practice and my classes. It is a posture that can be done by just about anyone, and I’ve even found it accessible to clients who are in acute back pain (although I wouldn’t recommend that someone in acute back pain use it without the help of an experienced instructor). This posture can be done on its own or used as an effective set up for any back bending asana. It is particularly useful for preparing the body and mind for prone back bends such as salabasana (locust), bhujangasana (cobra), urdhva mukha svanasana (upward facing dog) and dhanurasana (bow).
Take a look at the video above where I demonstrate the posture I call “3 Month’s Prone.” This video shows a limited view of the posture for the purpose of highlighting its key feature. For a somewhat more detailed video on this posture and a more complete view, refer to an earlier video I posted which you can find here.
As always, if you are uncertain of your ability to do such a posture, or if you have an injury to your spine, CONSULT YOUR DOCTOR BEFORE ATTEMPTING!
https://www.alignmentlab.net/wp-content/uploads/2023/08/Alignment_Web_Logo-300.jpg00Robert Brookhttps://www.alignmentlab.net/wp-content/uploads/2023/08/Alignment_Web_Logo-300.jpgRobert Brook2018-10-15 22:57:522018-10-22 22:25:46Stabilizing the Lower Back for Back Bends
Northern California is for the most part a pretty dry climate, but our fall season can be brutally so. By October we typically have not had any rain for several months and the heat of summer has dried up much of the moisture in the environment. When you add in the effects of our “Indian Summer” with it’s hot temperatures, dry winds and exceedingly low humidity you have a formula for serious vata derangement.
Even as I write this I can feel how much dryer my sinuses are compared to last week when we had that welcome, but unusually high humidity and tropical rain. I can feel the dryness right into the back of my throat, and I can’t seem to put enough lotion on my hands. My experience tells me that these are mild but significant early signs that excess vata is starting to weaken my tissue a little, and if I’m not careful I may succumb to a cold or begin having digestive issues.
Vata or vata dosta is a fundamental physical and psychological energy that helps to move anything that needs moving. Vata is responsible for the movement of our food through the digestive track, for moving the nourishment we receive from our food into and through our bloodstream to our tissues, for moving nerve impulses from our brains through our nervous system and into our muscles and skin and for moving our thoughts so as to enable thinking and conscious action. Vata dosha is light, dry, cool and lacking in it’s own source of stability.
When vata is elevated it acts like a dry wind, weakening tissues and making them more vulnerable to degradation and possible infection. Inappropriate diet or lifestyle choices or external factors such as the weather or season can disturb vata in us and this may begin to negatively affect our health. The effects of elevated vata dosa are subtle at first. Perhaps I’m having more gas than usual, or I’m a bit constipated. I might notice my skin is a bit dryer than usual or I feel a bit agitated mentally and am having trouble relaxing fully or sleeping restfully. Whatever the signs, it’s when these signs first appear that we have a chance to make choices that will offset this excess vata and prevent it from having a more significant impact on our health.
One of my favorite concepts from ayurveda is dinacharya or “the daily routine.” Outlined in the ancient ayurvedic texts, dinacharya is a way for each of us to begin each day in perfect balance with the natural world. Most of the elements prescribed in this daily routine are simple, practical and obvious. They include waking up early, washing our face, drinking water, using the toilet, brushing our teeth, bathing, dressing and exercising. Some activities prescribed in dinacharya are less obvious but no less practical, such as acknowledging the new day, however we may choose to do this.
One daily routine outlined in the classical texts that is not commonly practiced in the western world is the application of oil to the head and body. I call this self oil massage or self abhyanga. Self abhyanga is not complicated. It simply means covering the body from head to toe with a significant amount of oil, ideally one that is suited to our individual constitution. After the oil is applied, preferably in a warm environment, it should be left on for 10-15 minutes, if possible, to allow time for it to absorb through the skin and into other tissues in the body. After this time it should be cleaned off the body during a warm shower or bath.
Oil is frequently used in ayurveda because of the way in which it penetrates into tissues. If the oil has herbs cooked into it, then the oil acts as a carrying agent to deliver the herbs and their properties to specific tissues. More generally oil is used to add liquidity and stability to tissue that may be in need of it. One application of the use of oil that I find particularly helpful is nasya or the placing of oil into the nose. Nasya helps to keep sinus tissues moist, healthy and well functioning and when certain herbs are cooked into the oil the practice can also improve the voice, vision and enhance mental clarity. Placing oil in the nose is also one of the daily routines outlined in the classical ayurvedic texts.
Application of oil is also a simple and effective way of balancing vata dosa. The heavy, moist qualities of warm oil can help to balance the dry, light and cool qualities of vata. Therefore I feel that it is the dinacharya practices that involve the use of oil and which I’ve outlined above that can be particularly useful for us Californians during the fall season.
Here are some more details on how to do self abhyanga and self nasya. Since everyone’s constitution is different, contact me or another qualified ayurvedic practitioner for choosing the best oils for you.
Self Abhyanga
Fill a small plastic bottle such as a travel bottle for shampoo with a food grade oil appropriate for your constitution. If you’re not sure which oil to choose, contact me for help.
Boil some water to warm the oil. Meanwhile, place some old towels (that you don’t mind getting oily) on the floor of your bathroom. Warm the room up so that you not only won’t get cold being in there for 15-20 minutes, but may even have a chance to sweat a little.
Place your plastic bottle of oil into a large coffee mug or similar. When the water is at or near a boil, fill the mug most of the way up or until you’ve covered enough of the bottle to warm the oil well. Take your filled cup and warm oil into the bathroom and place it somewhere convenient.
Begin to apply the warm oil, starting at the crown of your head and working downward. Make sure you use enough oil on each part of the body that the skin there cannot absorb all of the oil you apply. If you have time, rub the oil in using longitudinal strokes on your bones and circular strokes on your joints. Don’t worry too much about getting this right.
When the body is completely covered with oil, leave it on for another 10-15 minutes. You might enjoy doing some yoga postures or other simple exercise, pranayama or breathing exercises or sitting for meditation. When you’re ready or running out of time, take a warm bath or shower and clean off all of the oil. You will likely need to shampoo your hair twice to get all of the oil out.
Self abhyanga can be thought of as an act of self love. The experience should be nurturing and not feel rushed or in any way an imposition. If you’re stressed and/or don’t have time to approach it in this way, leave it until you do.
Contraindications for self abhyana include: skin rash, menstruation, cold and flu
Self Nasya – applying oil to the nose
There are various medicated nasya oils in the marketplace. Typically these have nervine sedative and/or nervine tonic herbs cooked into them. The one that we sell at Alignment Lab and that we recommend is produced by Banyan Botanicals. If you are unsure of which medicated oil to use you can contact me for help. If you feel uncomfortable with using medicated oils you can also use plain sesame oil.
Self nasya works best if you’re lying down and have time to let the oil penetrate deeper into the sinus passages. Warm the oil to body temperature or slightly higher but NOT until it’s hot. Lie down on your back and place several drops of the warm nasya oil in each nostril as outlined in the product instructions. If you’re using plain sesame oil use 8-10 drops.
Remain in a reclining position for 1-5 minutes and relax, giving the oil a chance to penetrate deep into the sinus passages. If you’re using a medicated oil and wish to facilitate the nervine effects of the herbs in the oil, stay 5 or more minutes and give the oil a chance to penetrate even deeper.
*The nose is considered a direct pathway to the brain, and this can be an effective way of delivering the herbs and their properties to it.
For the quickie version, place some warm oil into the palm of your hand. This can be done, for example, during your self abhyanga. Dunk your pinkie finger into the oil and rub it gently into your nostrils. Repeat this 2-3 times for each nostril while “sniffing” the oil with moderate force to get it to move higher up into your sinus passages. Massage the inside of the sinuses to help the oil penetrate in.
*This quickie method can be helpful for keeping the sinus passages moist and enhancing their ability to resist environmental irritants.
The dinacharya are a wonderful way of making health and wellness a part of each and every day. Even if you don’t have time to do every one of the activities prescribed, just having these routines as a touchstone will be a powerful and supportive resource for you. I have learned a lot and received many benefits from practicing these daily routines and I’m confident you will too!
https://www.alignmentlab.net/wp-content/uploads/2023/08/Alignment_Web_Logo-300.jpg00Robert Brookhttps://www.alignmentlab.net/wp-content/uploads/2023/08/Alignment_Web_Logo-300.jpgRobert Brook2018-10-09 20:23:562018-10-09 20:23:56Dinacharya and the Fall Season
A Deeper Look at Pelvic Floor Strength and How to Build It – Part 1
in DNS, Health Article, Movement Article, Personal Alignment Training, VideosA quick online search for “strengthen the pelvic floor” reveals a lot about how many of us view the pelvic floor and its role in our health and function. There are any number of recommended exercises for the pelvic floor, some that include products to assist you, and with most advocating an approach that involves isolating the contraction of the pelvic floor muscles. This approach can be helpful for building some basic awareness of the pelvic floor – an important component of developing pelvic floor strength. But this approach is also limited in that it fails to address the broader and more essential role of the pelvic floor in facilitating alignment and functional movement.
The Pelvic Floor Does Not Work in Isolation
The pelvic floor muscles coordinate with several deep muscles in the trunk in order to stabilize the lower trunk and maintain the integrity of the pelvic organs, preserving continence and sexual function. These deep trunk muscles work synergistically with the pelvic floor and include the diaphragm, psoas, spinal muscles and the deep abdominal muscles. Collectively these muscles act as a flexible cylindrical, called the Thoraco-lumbar cylinder or TLC, with the pelvic floor forming the bottom of the cylinder. In addition to the muscles themselves we have a fascial layer that acts as a web-like connection between them. This facial layer interweaves the trunk and pelvic floor muscles and helps give the trunk and pelvis its shape and tone.
Diaphragmatic Breathing is Essential for Pelvic Floor Strength
This fascial connection between the trunk muscles and the pelvic floor assures no individual muscle will work properly unless there is appropriate movement and engagement in all of the muscles that form the cylinder. In other words, the pelvic floor muscles never contract in isolation, rather they co-contract in response to the movement of the diaphragm and the subsequent abdominal response needed to support the trunk. This means that in order to strengthen the pelvic floor we must breath diaphragmatically, and to maintain consistent optimal pelvic floor tone we must breath diaphragmatically throughout the day and especially during any exercise or activity.
The Role of Intra-abdominal Pressure
When we breath diaphragmatically, pressure is created inside the TLC which is similar to the pressure created inside a ballon filling with air. This pressure is called intra-abdominal pressure (IAP), and under ideal circumstances the muscles forming the TLC all respond to this pressure by contracting against it. This response should be relatively equal throughout the walls of the cylinder and serves to contain, maintain and regulate the IAP. Maintaining IAP helps us avoid stress on the pelvic and abdominal organs, spinal muscles and vertebral joints. Thus the pelvic floor has the important role of regulating IAP by helping to maintain relatively constant control of the cylinder, and in this way the relative tone of the pelvic floor directly influences the strength and function of the whole lower trunk.
If we do not breath diaphragmatically then we do not create proper IAP, and without proper IAP there simply cannot be the coordinated contraction of all the muscles of the cylinder necessary for trunk stability. In other words, there will be no response in the pelvic floor muscles if we are not breathing correctly.
Picture this: upon inhalation the pelvic floor widens to support the downward pressure created by the diaphragm. Then upon exhalation the pelvic floor co-contracts with the diaphragm and moves slightly up into the pelvis while the diaphragm moves back up into the ribcage. This coordinated movement between diaphragm and pelvic floor has a gentle squeezing effect on the spinal column and disks, keeping them plumb and lengthening the spine. This protects the joints of the spine from wear and tear and prevents damage to the disks.
Before beginning any pelvic floor specific strengthening exercises, diaphragmatic breathing with correct intra-abdominal pressure must be mastered!
For some people diaphragmatic breathing may be challenging at first, particularly if there is a a lot of tension in the trunk muscles. For others, years of chest breathing and/or shallow breathing can also make the trunk muscles weak and the back muscles too tight, preventing the alignment of the pelvis and ribcage necessary for diaphragmatic breathing to occur. Very often in these circumstances the pelvic floor muscles themselves are too tight, and this tension increases the tendency for pelvic floor disfunction.
Signs of and Contributors to Pelvic Floor Tension
Signs of a tight pelvic floor include lower back pain, incontinence issues, prostate and or bladder issues, prolapsed organs, and impairment of sexual function. Typically a tight pelvic floor is accompanied by certain muscular habits that manifest in conjunction with the pelvic floor tension. Habits that contribute to pelvic floor tension include clenching the lower glutes, tucking the pelvis, and sucking in the abdominal wall.
We live in a busy, stressful world and all of us are subject to potential stressors daily. An overactive stress response, either accompanying or even caused by long term habitual chest breathing is another important cause to be considered with pelvic floor disfunction (PFD). In such cases an effective approach to stress reduction is an essential component to any remedy.
Many of us have jobs that require a lot of sitting, either at the office and/or in the car on the way and home again. Those of us in this group are especially at risk of developing pelvic floor disfunction because long term sitting increases pelvic floor tension. The employment of a standing desk can help in these instances, but a more careful look at how we’re standing, or sitting, is an important part of any long term resolution.
Ignoring calls of nature because of busyness or distraction can be yet another source of stress that directly contributes to pelvic floor tightness and disfunction in a very obvious way. “Holding it” can become a habit that should be taken seriously, especially if PFD has already manifested.
Less obvious but no less important a contributor to PFD are cultural influences and images that present alignment pattens that we may try to emulate. Patterns such as a military posture with its arched lower back and tight glutes, as well as images from the fashion industry presenting beauty in the form of female bodies with forward hips and tucked pelvises no doubt reinforce patterns in younger people who are already developing these patterns through excessive sitting and staring at screens. Limiting screen time and setting healthier examples with our own alignment and movement habits are important considerations when managing this issue with our children.
Even in the wellness/fitness industry we are regularly presented with images of “healthy” bodies with sucked in over developed abdominals that are bulging and tight. We must remember that muscles that are too tight are also too weak to be functional. In order for a muscle to function well, it must have its full range of motion and be able to both contract well AND relax well. This is important to keep in mind not only with respect to aesthetics, but also with respect to steps we might take to mange pain. Bracing with the abs to manage back pain or PFD, for instance, is one of many habits that may be contributing to rather than solving our PFD.
A psoas release is a simple yet extremely effective way to help to begin to release many of the habits that contribute to PFD:
Once you begin to breath diaphragmatically and freely throughout the day and you combine it with a daily practice of letting go of dysfunctional tension habits, you will be ready to practice more specific pelvic floor re-training and strengthening. Because of the inter-connected fascial webbing, strengthening your pelvic floor muscle necessitates the ability to feel and develop responsiveness to the co-contraction of the muscles of the thoracolumbar cylinder.
Since the pelvic floor muscles are hard to feel, it can help to have a basic understanding of their anatomy to visualize and increase awareness of them. The pelvic floor muscles connect the pubic bone to the tailbone and each ischial tuberosity (sitting bone) to the other, and these muscles reside in three detailed layers.
Again, pelvic floor muscles are part of a deep myofascial grouping (close to bones and deep in the body), and because they are deep within the body these muscles are hard to sense. The function of these deeper muscles can also appear more subtle than that of the large superficial muscles like the quadriceps or gluteals which are much easier to feel and to activate.
But the deeper muscles of the trunk contain a larger amount of proprioceptive nerves than the superficial muscles, and these nerves help our body respond to changes in movement and loads quicker than our superficial muscles can – even quicker than we can respond with our thoughts. This is why symptoms of mild incontinence often occur with quick motions like jumping, running, and sneezing. Each of these motions requires the deeper muscles to be strong and responsive in order to manage the increased loads these and other movements may place on the pelvis and lower trunk. Strong and responsive trunk and pelvic floor muscles serve to prevent excessive loading of the bladder and urethra which might otherwise cause leaking.
To help you feel how these muscles co-contract together, here is a simple exercise:
In part 2 of this post we will look further at how to further strengthen the pelvic floor with more dynamic movements that involve bending, lifting and walking. Stay tuned!
Genetics and Health: Why Diet and Movement Matter
in Cardiovascular Health, Health ArticleThe other day I received an email from a good friend and client sharing a link to an article in the NY Times. The article discusses a recent study done with participants from an earlier study, completed in 2003, on the effects of exercise. This earlier study, done at Duke University and called “STRRIDE” (for Studies Targeting Risk Reduction Interventions through Defined Exercise), took several hundred individuals identified as sedentary and overweight and randomly assigned them to either a control group or one of two exercise groups. The two exercise groups included one that did “moderate” exercise, such as walking, and one that did “vigorous” exercise such as jogging. The exercise groups did their assigned exercise for 8 months. The control group did not exercise at all.
As you might expect, both exercise groups showed marked improvement in several health markers including aerobic fitness, blood pressure, insulin sensitivity and waist circumference, while the control group generally showed no improvement. For this recent study individuals from each of the groups were invited back to the lab for testing to see how they were faring. Those that agreed to come back were tested for aerobic capacity and metabolic health and were asked about their health conditions and medications.
Not surprisingly, those from the control group in the original study were even less fit now than they were in 2003 while those from either exercise group were still better off than the control group. Less obvious but still not surprising was the fact that those who had done “vigorous” exercise in the earlier study showed greater aerobic capacity than those in either the “moderate” exercise group or the control, losing on average only 5% vs. a 10% loss in the other two groups.
But what was very surprising to these scientists was that the “moderate” exercise group, who had only walked 3 times a week for 8 months during the earlier study, showed substantial improvement in blood pressure and insulin sensitivity compared with both the “vigorous” exercise group and the control group. NOW THIS IS THE MOST INTERESTING PART – these walkers also showed these lasting improvements to their health EVEN IF THEY HAD STOPPED WALKING AFTER THE 8 MONTHS! William Kraus, the professor of medicine and cardiology at Duke who oversaw the study suggested that the effect of exercise on our genes and our cells might explain the study’s findings.
I regularly have conversations with clients who ask me “is this problem something I can do something about or is just my age?” I always encourage clients to avoid chalking up problems to age, even if age might be a factor, because once we decide that some pain or loss of function is due to age then it places that issue into the category of “PROBLEMS I CAN’T DO ANYTHING ABOUT.” Once a health issue is put in this category it robs us of the capacity and motivation to do anything to improve it, and there’s just about always something we can do to make things better.
I see deferring to genetics in a similar way. If we make the assumption that a health issue we have or might develop is due to our genes, even if our mother or father did have the same condition, then it hampers our ability to deal with it in the same way that saying a problem is “just because I’m getting old” does. As long as the problem is under the “CAN’T DO ANYTHING ABOUT IT” umbrella then we’re unlikely to respond effectively.
Studies demonstrate, and pretty consistently I might add, that the health issues that most of us are dealing with or that we are most concerned about are caused by genetics only about 10 to 30 percent of the time. The other 70 to 90 percent of the time these health issues are caused by diet and lifestyle. Cardiovascular disease and diabetes in particular have been shown to manifest much more from lifestyle causes than from any genetic predisposition. Not only that, but it’s also been demonstrated that changes in lifestyle can influence our genetics so as to increase our genetic resistance to a chronic diseases such as cancer.
A 2016 pilot study done at The University of California San Francisco revealed that men with low risk prostate cancer who had decided to forgo treatment unless the disease progressed could improve the genetic markers for cancer by changing their diet. These men followed a diet outlined by Dr. Dean Ornish, and the men who followed this diet for 3 months saw some 500 genes change as a result. This included some tumor-suppressing genes that became more active with the change in diet, as well as some genes associated with increasing cancer risk that had switched off. The study did not set out to determine whether or not the changes in diet led to better long term health outcomes, but the changes in these men’s genetics were significant and promising.
Clearly our dietary choices are a powerful force for influencing our genes and any contribution those genes might make toward our manifesting a health problem, but what about our lifestyle choices? In her groundbreaking book, Move Your DNA, Katy Bowman argues for lifestyle, in the form of our daily movements, as a huge contributor to the health of our genes and their expression. She illuminates the important role of movement in gene expression by highlighting the difference between the genome and the mechanome.
The genome is the gene that we tend to think about when we think of our genes. This is the gene that resides with all our other genes in the nucleus of each and every one of our cells. This gene expresses itself by activating certain physical and/or functional characteristics that make us who we are as an individual. The mechanome is made up of this gene plus all of the exterior forces, many of them mechanical, that play a role in determining if and how a particular genome will be expressed.
To think of a gene as the primary actor in determining our health outcomes is like imagining some kind of stealth bomb in our body that will some day, likely when we least expect it, set off its charge and send us cascading toward some miserable end. Alternatively, the mechanome model presents a gene that is flexible and responsive to input, particularly movement input, and one that can, given the right input, just as easily contribute to a positive health outcome as a negative one. Therefore the amount and way we move, both a huge part of our lifestyle choices, can be a significant influence on our genes and how they influence our health and longevity.
Movement choices are like the dietary choices we make in that they provides us with yet another powerful tool by which to influence our health on the genetic level. In a recent post on yoga for health I discussed the role of mechanotransduction in movement and I describe how movement can be used to influence tissue health on the cellular level. Although I highlight yoga specifically in that article, yoga is just one example of an approach to movement that provides effective ways of using mechanotransduction to affect tissue health. Yoga is intelligent movement, but there are other ways of moving intelligently that can have similar benefits. Walking for instance, appears to have played a significant positive role in the gene expression of the “moderate” exercisers in the “STRRIDE” study discussed above.
It should be encouraging to all of us, and especially those of us who worry that our genetic makeup may be undermining our health and function, that the studies mentioned above show we can improve our chances of better health outcomes with diet and exercise / movement, even if we have genetic predispositions. These studies reveal that we needn’t be at the mercy of our genes and that we have it within our power to change our genes in ways that are positive and lasting.
A Case for Yoga: Improving Strength, Mobility and Overall Health
in Cardiovascular Health, Health Article, Movement Article, Personal Alignment Training, YogaAs a yoga teacher I’ve been advocating for a proactive effort to increase flexibility in the body for more than 2 decades. Yoga is generally seen these days as a valid way of increasing flexibility, but not necessarily one that offers the complete complement of physical benefits regarded as essential for overall health and wellness. For instance, many yoga students feel they need to engage in other activities for cardiovascular exercise, such as spinning, Zumba or running, to keep themselves healthy. Yoga, it appears for these folks, is not enough.
A decade or so ago when yoga was still “the new kid on the block” in the fitness industry, it enjoyed a sort of “cure for everything” status that temporarily shielded it from the responsibility to deliver on that promise. Now that yoga has slipped from it’s peak of popularity into the ever expanding menu of fitness options, it is held to the same standards that other types of “exercise” are and its strengths are weaknesses as an exercise form, depending on the type of yoga or the skill level of the instructor, have become more commonly known and accepted.
One strength of yoga that appears to be gaining ground in the scientific community and with the public is its efficacy in reducing the effects of stress and as a contributing factor to overall health and well being. A 2012 National Health Interview Survey (NHIS) found that, among the people surveyed who practiced yoga, 94% said they did so for “wellness-related reasons – such as general wellness/disease prevention or to improve energy,” with 82% of the respondents saying that it “improved their overall health” and 86% saying yoga reduced their stress.
I should point out here that the benefits of yoga reported above, along with other benefits reported for its positive effects on back pain, sleep, menopause, diabetes and other chronic disease and weight loss are mainly anecdotal. There is limited scientific support for nearly all of the claims made in yoga magazines and websites. But for some of these claims, such as yoga’s efficacy in building strength, the benefits are clear and undeniable.
The fact is, yoga postures done correctly place mechanical loads on our muscles, ligaments and bones in controlled and specific ways, and this type of loading, as dictated by the laws of our physical universe and the biological nature of our tissue, increases the load bearing capacity (ie- strength) of these tissues quite effectively. Without a doubt, yoga makes us stronger.
So if there is at least some evidence, even though mostly anecdotal, that yoga is good for stress reduction and overall health and well being, and clear evidence that yoga can be an effective way of building strength, then I would argue that latter is closely related to the former. The fact that yoga helps build strength is the reason that it helps with stress reduction and overall health.
This is because our overall health is largely defined by the health of our tissues. What are we but a highly complex arrangement of tissues and extra-cellular fluid (leaving aside the mind and the soul which are a subject for another time). We cannot be healthy and have a significant amount of unhealthy tissue in our body. Conversely, our overall level of tissue health is directly related to our overall health in general. The healthier our tissue is, the healthier we are.
So what exactly does strength have to do with tissue health? The answer lies in understanding our tissues on both macro and microcosmic levels. If for instance I want to strengthen my legs and hips I might choose to do more standing postures. The mechanical loads these postures place on the muscles and other tissues in my legs and hips will help these tissues handle loads better, thereby making them stronger. But what happens to the individual cells in the various tissues in my legs? I would argue that these same postures also improve the strength of the individual cells in the tissues that make up my legs and hips. This is due to a phenomenon knowns as mechanotransduction.
Mechanotransduction occurs when a mechanical stimulus is converted into a set of biochemical reactions and corresponding a cellular response. This cellular response can vary depending on the type of cell and stimulus, but generally involves enhanced gene expression and positive physical changes to the cell. Scientifically, mechanotransduction is a concept still in its infancy in terms of study and understanding, but the studies that have been done suggest that mechanical loads on the microcosmic level mimic those on the macrocosmic. That is, mechanical loads that make our muscles and bones stronger also make our cells “stronger” in the sense that they improve their adaptiveness and enhance their functional role in our bodies.
Therefore I’d suggest that “weight bearing exercise”, which is basically deliberate mechanical loading of our tissues, not only has the potential to build strength and resiliency in that tissue but also, as a result of mechanotransduction, similarly loads our cells and stimulates greater responsiveness and resiliency on the cellular level, improving the health of those cells, the tissues they make up and our overall health in general.
I place “weight bearing exercise” in quotations here because it can and does mean more than it’s common interpretation suggests. Sitting for example, can be a kind of “weight bearing exercise” in the sense that it places mechanical loads on the tissues of our hips and legs and, if done in the right way, has the potential to make them stronger and more resilient. On the other hand, sitting can and often is counterproductive in this regard because it is not done in the right way, or is done for too long, and will in this case damage tissue health by limiting mechanotranscduction and impairing tissue health.
This brings me back to the importance of flexibility, or as I prefer to think of it, mobility. Having good flexibility means having functional mobility which is the ability to mobilize the body in a variety of ways. Mobility allows me to move more of my joints and tissues through their various ranges of motion and this means a wider and more varied distribution of mechanical loads to more of my tissues. A major benefit of mobility therefore is the stimulation of mechano-transduction in more of the cells in more of my tissues and an improvement in the healthful expression of those cells and those tissues. Floor sitting done properly, for example, can be and effective way of improving the mobility of the hips, knees and ankles and can therefore promote the health of the tissues in the lower half of the body.
A less obvious benefit to functional mobility is the enhancement of my cardiovascular system. Improved and varied mobility of the body generally improves the mobility and more specifically the elasticity of my arterial system, helping to normalize blood pressure and reduce the effects of various types of stress on vessel walls. This particular benefit of functional mobility, which incidentally is facilitated rather well by regular and correct practice of yoga, improves the responsiveness and resiliency of my cardiovascular system and prevents chronic diseases related to it.
I’ve tried here to make a case for yoga as having the potential to be as complete as any other form of “exercise” for promoting and maintaining health. It’s reputation for helping mainly with flexibility and stress is a very limited view that fails to tell the whole story of its full potential. This potential, to literally enhance and maintain our tissue health on the cellular level, is open to anyone willing to spend the time and energy to learn it.
Strength Training: Open vs. Closed Kinetic Chain Movement
in Health Article, Movement Article, Personal Alignment TrainingAt Alignment Lab we always encourage our clients to move more and build strength, but it is common in our practice to see clients who have developed injuries from working out at the gym with certain machines or when doing isolated exercises with weights. Many of the exercises these clients are doing involve movements that fall under the category of open kinetic chain movement (OKCM). In the interest of maximizing the health benefits of exercise and minimizing the chances of injury, we generally try to steer our clients away from (OKCM) exercises and guide them towards exercises that feature closed kinetic chain movement (CKCM).
What is the difference? OKCM exercises involve isolating a particular muscle and then challenging it with weight and or resistance by shortening (concentrically loading) the muscle. A classic example is the biceps curl, which involves picking up a weight, say a dumbbell or kettle bell with the hand, and then bending the elbow to lift the weight toward the shoulder. This exercise can be done with one or both arms, and in either case the hands are not fixed, thus the “open” kinetic chain.
CKCM involves movement relative to a fixed point. This means that some part of the body, usually a hand or a foot, is brought in contact with a stable surface such as the floor or a wall. Typically there is some amount of weight bearing involved to keep that contact point stable. The stability provided by the fixed point and the weight bearing promotes stability in the body where needed so that the exercise can be done with greater safety an efficacy.
In the example of the biceps curl, there is no fixed point. Every part of the body has the potential to move in some way during the exercise, and thus there is a lack of stability and a greater chance of strain. This exercise not only increases the chances of straining the biceps, but also the shoulder joint. Without the added stability of a fixed point the body will have a harder time keeping the humerus stable in the shoulder socket, increasing the chances of exceeding the load bearing capacity of the joint. In the end, we may end up with bigger biceps, but likely more wear and tear on the shoulders.
One solution to this problem with the biceps curl that is often used to improve its efficacy is to stabilize body by sitting on a stable seat and then placing the elbow of the working arm on a support. These changes do serve to focus the action of the arm more effectively on the biceps, but they do not necessarily make it more safe. The reason is that even though to some degree stability has increased, it has not increased in a way that eliminates potential impact on the shoulder joint.
Because there is a greater amount of force on one isolated joint, in this case the shoulder joint, this movement can easily lead to strain in the tendon of the bicep attaching to the shoulder joint. This is because mechanoreceptors in the shoulder are not well activated in this exercise. The mechanoreceptors help us feel joint position, and if they are not activated it will be more difficult to sense whether or not the shoulder joint maintains functional alignment. If the exercise is done without a functional alignment in the shoulder joint it may result in an injury.
It is important that we continue to challenge our muscles and their ability to bear weight, but preferably not at the expense of our joint health. Open kinetic chain movement (OKCM) exercises tend to increase this likelihood. Closed kinetic chain movement (CKCM) exercises on the other hand provide an opportunity to increase our strength with much less chance of injury.
While the primary difference between a CKCM exercises and an OKCM exercise is that CKCM exercises feature movement relative to a fixed point, another equally important difference is that CKCM typically feature some approximation of the joint due to the weight bearing on the fixed limb. This means that pressure, usually caused by the weight of the body, pushes the arm toward the shoulder joint, soliciting a stabilizing response in the joint. A great example would be a side plank. In this exercise one hand is fixed on the floor, and the shoulder on the same side gets approximated by the weight of the body. This helps stabilize the shoulder joint and facilitates healthy rotational movement (abduction) around the joint.
Another feature of CKCM is that it involves the motion of muscles across multiple joints. This means that these movements go beyond the isolation of one particular muscle, unlike many of the OCKM exercises commonly used in strength training (such as the biceps curl). Moving across multiple joints requires a complex synchronization of different muscle groups and therefore not only works more muscles but works them in tandem with one another, promoting strength in a functional way.
In addition, when movement occurs across multiple joints with many muscles involved it facilities co-contraction between muscles and this co-contraction, it turns out, is a more efficient way to to bear weight. When muscles co-contract with other muscles, the load is distributed across a broader area, preventing isolated muscle fatigue and decreasing shearing forces on the joints and tissues, ultimately decreasing the likelihood of strain and inflammation.
This alludes to the fact that CKCM’s are good for our tissue. These movements improve blood flow, flexibility, lymph drainage, muscle health, circulatory function and cardiovascular health in a far greater way than any open kinetic chain exercise. CKCM’s will have increased metabolic effects compared to OKCM’s, and they also promote joint health by helping to re-establish proprioception and our ability to sense joint position.
One further benefit of CKCM’s is that these movements improve function of the nervous system. This is because when more muscles and joints are moving in a complex closed-kinetic chain pattern, more nerves are firing. More nerves firing means more blood flow, better communication with the brain and thus a greater ability to dynamically move through space with intelligence.
Finally, closed kinetic chain movements are simply more functional than open kinetic chain movement in that CKCM’s are more often based on movement patterns that are innate to the human body. As babies and toddlers, each of us develops our physical function through a series of innately choreographed movements, and these movements manifest from the age of three months up to the point of walking without any instruction or mimicry taking place. This means that we don’t learn these movements from someone else, we just do them. These movements are innate in all babies, everywhere in the world, and they tell us a lot about functional motion and how the utilization of the hands and feet in a closed kinetic chain is the basis for all natural human motion.
Going back to our bicep curl exercise, let’s compare it with a closed kenetic chain movement involving the biceps and triceps using the example of a wall plank. A wall plank is basically a plank position where the head, shoulder girdle, rib cage, pelvis and legs are all in a stacked, vertical alignment with the hands on the wall standing at arm’s length. The movement involves pushing into the wall to fully extend the elbows.
Once it becomes relatively easy to do a wall plank while maintaining good alignment, a full plank can be introduced involving the more challenging version of pushing up off the floor. In a full plank the biceps and triceps get worked but in a clearly functional way that facilitates our ability to lower ourselves down to the floor and lift ourselves up off the floor.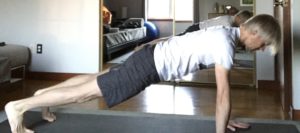
There’s a lot of press about strength training these days with ever growing evidence of its importance for human health and longevity. At Alignment Lab we’re big fans of strength training and we provide it daily with every one of our clients by teaching them mainly closed chain kinetic movements. We’ve found this approach to be ideal for promoting functional strength that is at once empowering, health promoting and practical.
Ojas and Agni: Essentials For Lasting Health
in Ayurveda, Health ArticleOjas is a concept in Ayurveda that refers to the purest essence of each of the tissues of the body. For those not familiar with Ayurveda, ojas is perhaps most relatable as expressed by the immune system and our body’s ability to resist and illness and recover from it when it manifests. More broadly, ojas is that aspect of each tissue that supports that tissue metabolically on the cellular level, enabling each of our cells and our tissue as a whole to resist the effects of stress and to maintain integrity and resilience.
Ojas supports our health by helping to support healthy agni. Agni means “fire” and is the word we use in Ayurveda to refer to our digestive fire or our digestive power and intelligence. Having a well functioning agni means that our ability to digest and assimilate our food is sound. We all know the expression “you are what you eat,” and in a certain sense this is literally true. The food we eat becomes the tissue that forms our body, but for this to happen our agni needs to be functioning well, and for a well functioning agni we need healthy ojas.
The feeling of having good ojas is easily relatable. When our ojas is good we feel strong, we feel well, our digestion works and our sleep is good. When ojas is insufficient our sleep can suffer, our digestion will have issues and we’ll feel vulnerable. The fact is, we ARE vulnerable when ojas is low, and it is important that we take steps to increase it or risk further depletion and possibly illness.
Maintaining healthy ojas can be done in several ways. First, we must keep our digestion working well. Ojas is manufactured in our bodies through the digestive process. It is the very refined end product of tissue production and thus not only does ojas support our agni and our digestive health, but our agni and digestive health also support our ojas. This symbiotic relationship between ojas and agni points to the fact that our primary means of maintaining good ojas is by seeing to it that our digestive system works well.
Of course to maintain healthy digestion, the right diet is important. I won’t be going into detail on diet in this post, but what I will say is that with diet, we need to learn to recognize how we respond to different foods and to use this recognition to make better choices. Too many people these days try to seek health through addition rather that subtraction. “I feel depleted so I’ll take supplements or eat more meat.” My experience is that its often better to start with “what can I eliminate?” Eliminating foods we don’t digest well or don’t respond well to takes pressure off our digestive system and helps our agni ignite. This in turn helps improve our ability to break down and assimilate our food, forming healthy tissue and making healthy ojas.
A second key to keeping our ojas at a a level sufficient for good health is making lifestyle choices that don’t deplete us. Avoiding depletion requires that we recognize the activities, thoughts and habits that lower our ojas and eliminate or reduce them whenever possible. For example exercise is generally a good thing and most of us need to do more of it, but like anything, there’s enough and there’s too much. Over exercising is a sure way to deplete ojas and invite illness and even chronic disease in very serious cases.
How do I know if I’m over exercising? This is just a matter of paying attention. While it’s not always easy to pay attention to the messages our bodies send us, learning to pay attention to our bodies is an important ability to cultivate. Yoga can be a powerful tool in this case as yoga, in its essence, is training the mind to be aware. Through yoga we develop the awareness and sensitivity to notice the signs that something we are doing is depleting us. Yoga provides us with asana (postures), pranayama (breath work) and ethical principles that help us to see ourselves more clearly, understand our tendencies and make the necessary changes to address them.
This brings us to the third way we can help maintain healthy ojas – awareness of our thoughts and managing mental and/or emotional stress. Stress is a big factor in lowering ojas. Without learning effective ways of managing stress we will struggle to maintain good ojas and good health. Again, yoga can be a big help with stress management as it trains us to keep things in perspective and cultivate a healthy perspective on life. Many people use mediation practice for stress management. I tend to lump mediation in with yoga because yoga is essentially a preparation for and cultivation of a meditative state, as are the many meditation techniques that are currently popular.
Considering ojas and forming an understanding and experience of it is a powerful way of dialing in our diet and lifestyle choices to best suit our constitution so that we may maintain resilience and optimal health on an ongoing basis. Understanding agni and learning to keep it in good working order is essential for building ojas. When we maintain healthy agni we begin to experience the positive effects of ojas and sense of well being it fosters. Whether it be through yoga or some other awareness based practice, it’s a worthwhile endeavor to develop the necessary skills and sensitivity to recognize when our agni and our ojas are compromised and to take steps to restore them.
Building Resilience and What I Did on My Christmas Vacation
in Ayurveda, Health ArticleThis past Christmas / New Years Tiffany and I traveled to New Zealand with some friends to see my mother and her husband and to do some traveling on the south island. The way that Air NZD runs their flights to and from, we basically had red eyes going in each direction. In an effort to be good citizens we declared our hiking shoes on the way into the country, only to be delayed in a long and inefficient customs line and missing our connection to Queenstown, then having to take an extra flight to Wellington to get there. When we completed the hour plus drive to Wanaka from Queenstown I was a bit tired, but overall not too much worse for wear.
Then on a warm, cloudless Christmas Day, just a couple of days after our arrival, we hiked Isthmus Peak near Wanaka. The hike took nearly 6 hours and involved climbing continuously up 4000 vertical feet on a completely exposed trail. I was physically tired from it, but again, felt pretty good the day after and going forward.
A day or so after that we splurged big and hired a plane to fly us from Wanaka to Milford Sound where we took a 2 hour cruise through the sound before hopping back on the plane and flying back to Wanaka. I am quite prone to motion sickness, and this was not a big stable commercial jet but a 6 seater prop plane that felt like flying in a yellow bucket with wings. The views were out of this world, but also dizzying. My friend seated behind me faired rather poorly, but I managed to walk away from the trip with relatively little impact.
After a 4 night stay in Wanaka we said goodbye to my mother and her husband David, and then Tiffany, our friends and I hit the road for another 10 days. In those days we spent countless hours in the car and never slept in the same strange bed for more than 2 nights. The balance of the trip included more hiking, quite a bit of sight seeing and a lot of restaurant food.
On the way home from Auckland after connecting from Nelson I watched 4 movies and semi-slept for a few hours before navigating customs and catching the airporter back to Marin. Oddly, when I got home from the near 24 hour return trip I felt almost as though I had never left and traveled 1/2 way around the globe and back again.
What I realized from this experience and the reason I’m telling you about it is that I had, without really focusing on it or explicitly trying to cultivate it, managed to build a fair bit of resilience. I can think of no other way I would have made such a big and involved trip with so little relative impact on my health and sense of wellbeing.
This got me thinking about resilience and how it manifests. Most of us can claim at least some degree of resilience in some areas of our lives. I might have good flexibility and enjoy the kind of resilience that affords by allowing me to occupy relatively small and cramped spaces for extended periods, like coach airplane seats for instance, and bounce back quickly from it. Or I might have good strength and can manage lugging heavy baggage through airports or charging up and down mountains in the hot sun without suffering an injury. Or I might have a digestive system that can handle all sorts of foods from all sorts of unfamiliar kitchens with very few digestive complaints. Or perhaps I have an immune system that can handle the stress of a lack of sound sleep and an excess of different environments and degrees of air quality without succumbing to bugs, respiratory or otherwise.
But it’s unusual, in my view, that each of us has all of the areas of our life that afford us resilience in optimal working order, and for most of us any deficiencies in resilience can be corrected with very doable changes in diet and lifestyle. This view has inspired me to write a series of posts on the subject. These posts will address several key areas where we can increase our resilience and they will offer suggestions on how to build and effective bulwark to the inevitable stresses that we all endure, voluntarily or otherwise.
I hope you’ll find these helpful. As always, I welcome your feedback.
Warrior 1 (virabhadrasana 1) – Set Up and Cues
in Movement Article, Videos, YogaArguably the most challenging of the classical standing postures, virabhadrasana 1 or “Warrior 1” places great demands on our pelvic and trunk stability, along with the strength and mobility of the hips and shoulders. This posture requires the ankles and feet to work well, and that our spinal column has good mobility.
When doing Warrior 1, we must maintain constant awareness of where all of the various mechanical loads are placed, and thus Warrior 1 also poses a great challenge to the mind. We must remain present at every moment we are in the posture, both for safety as well as a successful outcome.
Warrior 1 includes a back bend as one of its key elements. If you have a low back injury, I would not recommend learning this posture on your own. PLEASE SEEK A SKILLED INSTRUCTOR FOR HELP.
Even if you’ve had experience with the posture, I would encourage you to watch my video on stabilizing the lower back for backbends before watching this video for a better understanding of how to approach the back bending element in Warrior 1.
Applying DNS and Core Stabilization in Yoga
in Health Article, Movement Article, YogaSeveral years ago when I was deep into Katy Bowman’s bio-mechanical approach to postures and movement I began to better understand some of the postural habits and faulty mechanics that were impacting my health and the health of my clients. It became clear to me that it was these habits and their frequent repetition while standing, sitting, squatting, bending forward and walking that lead directly to the manifestation of the chronic injuries and pain patterns that are epidemic in our modern lives. I also understood that if we were to overcome our injuries we needed to address them at their root cause by changing the way we move.
As this understanding came into focus, I started to take a closer look at the yoga postures I was doing and teaching and I had a realization. Those of us who do yoga tend to bring the very same postural patterns and poor mechanical habits we use in our daily lives into our practice of yoga postures. Therefore going to a yoga class often amounts to simply finding new and interesting ways to reinforce our patterns and promote our injuries.
This opinion is partly based on the fact that yogasana or the practice of yoga postures is extremely difficult. The posture themselves are for the most part so complicated and demanding that anything approaching mastery may arguably remain elusive for most. Yet it is also this degree of challenge posed by yogaasana which is the very thing that makes it potentially so powerful. If I manage to master even one posture I will have overcome much of my habituation, physically and mentally.
With the manifestation of this view I began changing my approach to practice and to teaching. I started introducing simpler postures that were more accessible and less physically demanding. I also began to emphasize the development of movement skills that could be applied not just to yoga but to the movements we do all day long. After all, what good is my trikonasana if I can’t bend forward properly to pick something up or squat down to use the toilet.
I then reintroduced some of the classical postures, not so much as postures to be mastered but rather as opportunities to apply the skills learned in the simpler postures to decidedly more challenging ones. The classical postures put the skills we learn in the simpler postures to a strong test, and they provide an opportunity to apply multiple skills at the same time. I liked this approach and still do, but until recently I felt there was something missing.
With the addition of my DNS training I feel I’ve found that missing piece. It’s the skill that integrates all of the other skills and organizes them into a cohesive whole. It’s the skill that transforms a set of applied skills, movements and stretches into a true asana – a posture that expresses both stability and ease. That skill is the skill of stabilizing the pelvis and trunk in a way that not only allows but in fact facilitates free movement. This skill is true “core stabilization.”
The DNS approach to core stabilization is not something I ever learned in a yoga class, but it applies to yoga wonderfully! I feel strongly that it’s a skill that has the power to transform any yoga practice. And for those who don’t practice yoga, proper core stabilization will improve whatever movement practice or sport they choose to do, not to mention greatly improve the movements they do outside of any structured class or activity.
I’ve begun to post a series of short videos in which I offer an approach to setting up some of the more common classical yoga postures. The videos also include some voiceover cues for guidance. My approach to each of these postures emphasizes core stabilization as the foundation for each. I don’t necessarily use the term “core stabilization” in the video, but hopefully as you watch these you’ll begin to understand what I mean when I say “stabilize” or “stabilize the pelvis” or “stabilize the lower trunk,” and you’ll begin to apply this in your own postures.
Before watching these videos I recommend watching the more basic DNS videos that are already posted. It’s important that you understand how to breath diaphragmatically and to establish intra-abdominal pressure before you can do the kind of core stabilization I am referring to in the post and in the asana videos. Just click on the links above to view those videos before moving on to the others.
If you’re new to yoga, these videos are not meant for you. They are intended for students will some experience. If you’re an experienced yoga practitioner or teacher, I ask that you keep an open mind. The feedback I’ve been getting these days from the experienced yogis that find their way into my classes is that I’m doing something very different from what they’ve been taught before. Hopefully this makes for a great reason to take an interest and see what might be of value and not a reason to reject it simply because it doesn’t sync with past experiences or understanding.
Whatever your view, my practice and my teaching have always been and always will be a work in progress. Therefore I welcome your comments and look forward to hearing from you and getting your feedback. No doubt your input will help me refine and improve my practice and my teaching moving forward.
Namaste’
Stabilizing the Lower Back for Back Bends
in Movement Article, Videos, YogaOver the last decade as I’ve been exploring different approaches to movement, I’ve always found myself coming back to my yoga practice asking the question “how does what I’ve learned inform my approach to yoga?” For the most part I’ve consistently found that new knowledge from different perspectives has facilitated greater insight into many classical yoga postures and, simply put, allowed me to perform many of these postures better and safer.
Because my personal practice and my teaching have placed greater and greater emphasis on postures that maintain a neutral spine, I must acknowledge that this approach has been at the expense of a great many important postures, arguably the postures that most distinguish yoga from other movement practices. The postures most conspicuously absent for a long time were “forward bends” and “back bends,” the two classifications of asana that involve deliberately moving the spine out of neutral and into flexion and extension respectively.
More recently, as I’ve begun to emphasis stabilization of the spine rather than neutrality, it has opened up my practice and teaching playbook to forward bends and back bends once again. And once again, I find I am understanding and performing these types of postures better than ever before, albeit with a bit of rust to work off. Back bends in particular have been a thrill to come back to and to perform with the ideal combination of safety and efficacy that I believe is essential to the practice of any asana.
One simple posture has laid the foundation for me to reintroduce more back bends into my practice and my classes. It is a posture that can be done by just about anyone, and I’ve even found it accessible to clients who are in acute back pain (although I wouldn’t recommend that someone in acute back pain use it without the help of an experienced instructor). This posture can be done on its own or used as an effective set up for any back bending asana. It is particularly useful for preparing the body and mind for prone back bends such as salabasana (locust), bhujangasana (cobra), urdhva mukha svanasana (upward facing dog) and dhanurasana (bow).
Take a look at the video above where I demonstrate the posture I call “3 Month’s Prone.” This video shows a limited view of the posture for the purpose of highlighting its key feature. For a somewhat more detailed video on this posture and a more complete view, refer to an earlier video I posted which you can find here.
As always, if you are uncertain of your ability to do such a posture, or if you have an injury to your spine, CONSULT YOUR DOCTOR BEFORE ATTEMPTING!
Dinacharya and the Fall Season
in Ayurveda, Health Article, YogaNorthern California is for the most part a pretty dry climate, but our fall season can be brutally so. By October we typically have not had any rain for several months and the heat of summer has dried up much of the moisture in the environment. When you add in the effects of our “Indian Summer” with it’s hot temperatures, dry winds and exceedingly low humidity you have a formula for serious vata derangement.
Even as I write this I can feel how much dryer my sinuses are compared to last week when we had that welcome, but unusually high humidity and tropical rain. I can feel the dryness right into the back of my throat, and I can’t seem to put enough lotion on my hands. My experience tells me that these are mild but significant early signs that excess vata is starting to weaken my tissue a little, and if I’m not careful I may succumb to a cold or begin having digestive issues.
Vata or vata dosta is a fundamental physical and psychological energy that helps to move anything that needs moving. Vata is responsible for the movement of our food through the digestive track, for moving the nourishment we receive from our food into and through our bloodstream to our tissues, for moving nerve impulses from our brains through our nervous system and into our muscles and skin and for moving our thoughts so as to enable thinking and conscious action. Vata dosha is light, dry, cool and lacking in it’s own source of stability.
When vata is elevated it acts like a dry wind, weakening tissues and making them more vulnerable to degradation and possible infection. Inappropriate diet or lifestyle choices or external factors such as the weather or season can disturb vata in us and this may begin to negatively affect our health. The effects of elevated vata dosa are subtle at first. Perhaps I’m having more gas than usual, or I’m a bit constipated. I might notice my skin is a bit dryer than usual or I feel a bit agitated mentally and am having trouble relaxing fully or sleeping restfully. Whatever the signs, it’s when these signs first appear that we have a chance to make choices that will offset this excess vata and prevent it from having a more significant impact on our health.
One of my favorite concepts from ayurveda is dinacharya or “the daily routine.” Outlined in the ancient ayurvedic texts, dinacharya is a way for each of us to begin each day in perfect balance with the natural world. Most of the elements prescribed in this daily routine are simple, practical and obvious. They include waking up early, washing our face, drinking water, using the toilet, brushing our teeth, bathing, dressing and exercising. Some activities prescribed in dinacharya are less obvious but no less practical, such as acknowledging the new day, however we may choose to do this.
One daily routine outlined in the classical texts that is not commonly practiced in the western world is the application of oil to the head and body. I call this self oil massage or self abhyanga. Self abhyanga is not complicated. It simply means covering the body from head to toe with a significant amount of oil, ideally one that is suited to our individual constitution. After the oil is applied, preferably in a warm environment, it should be left on for 10-15 minutes, if possible, to allow time for it to absorb through the skin and into other tissues in the body. After this time it should be cleaned off the body during a warm shower or bath.
Oil is frequently used in ayurveda because of the way in which it penetrates into tissues. If the oil has herbs cooked into it, then the oil acts as a carrying agent to deliver the herbs and their properties to specific tissues. More generally oil is used to add liquidity and stability to tissue that may be in need of it. One application of the use of oil that I find particularly helpful is nasya or the placing of oil into the nose. Nasya helps to keep sinus tissues moist, healthy and well functioning and when certain herbs are cooked into the oil the practice can also improve the voice, vision and enhance mental clarity. Placing oil in the nose is also one of the daily routines outlined in the classical ayurvedic texts.
Application of oil is also a simple and effective way of balancing vata dosa. The heavy, moist qualities of warm oil can help to balance the dry, light and cool qualities of vata. Therefore I feel that it is the dinacharya practices that involve the use of oil and which I’ve outlined above that can be particularly useful for us Californians during the fall season.
Here are some more details on how to do self abhyanga and self nasya. Since everyone’s constitution is different, contact me or another qualified ayurvedic practitioner for choosing the best oils for you.
Self Abhyanga
Fill a small plastic bottle such as a travel bottle for shampoo with a food grade oil appropriate for your constitution. If you’re not sure which oil to choose, contact me for help.
Boil some water to warm the oil. Meanwhile, place some old towels (that you don’t mind getting oily) on the floor of your bathroom. Warm the room up so that you not only won’t get cold being in there for 15-20 minutes, but may even have a chance to sweat a little.
Place your plastic bottle of oil into a large coffee mug or similar. When the water is at or near a boil, fill the mug most of the way up or until you’ve covered enough of the bottle to warm the oil well. Take your filled cup and warm oil into the bathroom and place it somewhere convenient.
Begin to apply the warm oil, starting at the crown of your head and working downward. Make sure you use enough oil on each part of the body that the skin there cannot absorb all of the oil you apply. If you have time, rub the oil in using longitudinal strokes on your bones and circular strokes on your joints. Don’t worry too much about getting this right.
When the body is completely covered with oil, leave it on for another 10-15 minutes. You might enjoy doing some yoga postures or other simple exercise, pranayama or breathing exercises or sitting for meditation. When you’re ready or running out of time, take a warm bath or shower and clean off all of the oil. You will likely need to shampoo your hair twice to get all of the oil out.
Self abhyanga can be thought of as an act of self love. The experience should be nurturing and not feel rushed or in any way an imposition. If you’re stressed and/or don’t have time to approach it in this way, leave it until you do.
Contraindications for self abhyana include: skin rash, menstruation, cold and flu
Self Nasya – applying oil to the nose
There are various medicated nasya oils in the marketplace. Typically these have nervine sedative and/or nervine tonic herbs cooked into them. The one that we sell at Alignment Lab and that we recommend is produced by Banyan Botanicals. If you are unsure of which medicated oil to use you can contact me for help. If you feel uncomfortable with using medicated oils you can also use plain sesame oil.
Self nasya works best if you’re lying down and have time to let the oil penetrate deeper into the sinus passages. Warm the oil to body temperature or slightly higher but NOT until it’s hot. Lie down on your back and place several drops of the warm nasya oil in each nostril as outlined in the product instructions. If you’re using plain sesame oil use 8-10 drops.
Remain in a reclining position for 1-5 minutes and relax, giving the oil a chance to penetrate deep into the sinus passages. If you’re using a medicated oil and wish to facilitate the nervine effects of the herbs in the oil, stay 5 or more minutes and give the oil a chance to penetrate even deeper.
*The nose is considered a direct pathway to the brain, and this can be an effective way of delivering the herbs and their properties to it.
For the quickie version, place some warm oil into the palm of your hand. This can be done, for example, during your self abhyanga. Dunk your pinkie finger into the oil and rub it gently into your nostrils. Repeat this 2-3 times for each nostril while “sniffing” the oil with moderate force to get it to move higher up into your sinus passages. Massage the inside of the sinuses to help the oil penetrate in.
*This quickie method can be helpful for keeping the sinus passages moist and enhancing their ability to resist environmental irritants.
The dinacharya are a wonderful way of making health and wellness a part of each and every day. Even if you don’t have time to do every one of the activities prescribed, just having these routines as a touchstone will be a powerful and supportive resource for you. I have learned a lot and received many benefits from practicing these daily routines and I’m confident you will too!